Card is a website for an independent professional or a small practice: consultants and coaches, therapists and counsellors, solicitors, lawyers and accountants. Its one job is to get the first call booked.
Read the installing and setup parts first. They set up everything else.
Installing
- Appearance → Themes → Add New → Upload Theme
- Choose
varnify-card-<version>.zip, install, activate
Activating creates a Writing page for your blog and installs default booking hours (weekdays, 09:00 to 17:00). It does not change your reading settings or touch anything you have already made.
There is no plugin to install and nothing to buy afterwards.
Updates
New versions of Card come from varnify.com, not WordPress.org. Card has one price and every feature is in it, with no upsells. Your licence covers updates for one site, and 12 months of personal support: put the key from your email from Varnify in Appearance → Licence and updates and press Save. A new version then shows on Dashboard → Updates and on the Themes screen like any other update, and you install it with one click. Check for updates now on the same screen asks straight away instead of waiting. To have WordPress install new versions by itself, open Appearance → Themes, click Card and choose Enable auto-updates.
To check, Card sends your site’s address and your key to varnify.com, at most twice a day. Nothing else is sent.
If the shop cannot accept a key, the Themes screen says why in a sentence: it does not know the key (check it against your email from Varnify), the key is for a different Varnify theme, or the key was cancelled.
Set up Card: three steps
A notice at the top of the dashboard offers Set up Card. It is also under Appearance → Set up Card, and you can run it again whenever you like.
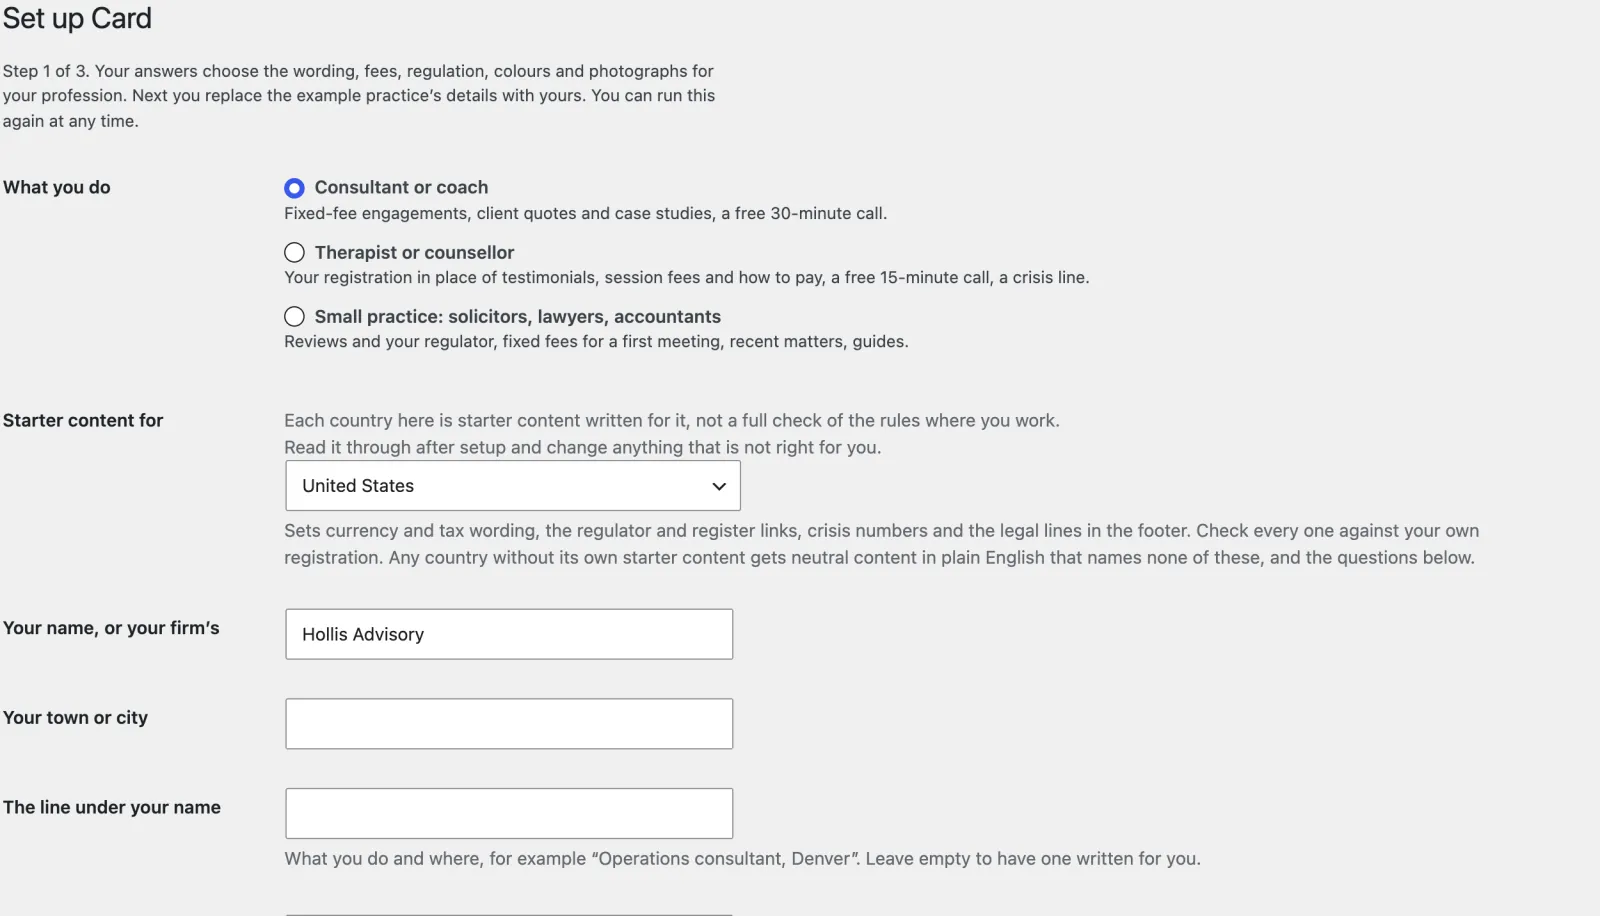
Step 1 is nine questions about what you do, where, and how the site looks:
| Question | What it sets |
|---|---|
| What you do | Consultant or coach, therapist or counsellor, or small practice. Chooses the wording, the proof (client quotes, your registration, or reviews), the steps, the length of the first call (30, 15 or 45 minutes), the photographs and the colours. |
| Starter content for | Your country. The United States, United Kingdom, Canada and Australia have starter content written for them: currency and tax wording, regulators and register links, crisis numbers, how clients pay, and the legal lines in the footer. It is starter content, not a check of the rules where you work: read it through after setup and change anything that is not right for you. Anywhere else, choose your own country (see “Anywhere else” below). |
| Your name | The site title: the firm on your calling card and in the header. |
| Your town or city | Used wherever the wording names a place. |
| The line under your name | For example “Operations consultant, Denver”. Leave it empty and one is written for you. |
| Send bookings and messages to | The address that gets every booking and message. |
| Your time zone | The city nearest you. Booking times follow it, through daylight saving. Card guesses it from your computer. |
| Your ink | The one colour the site is printed in besides black. Your profession’s is chosen for you. See “Ink and type”. |
| Type | The design’s own type, or one of three presets. |
It also, if you leave the boxes ticked:
- copies the starter photographs into your media library, so phones get smaller versions of them;
- adds example case studies and essays with photographs, marked as examples, so you can see how finished pages look. Running the wizard again with another profession removes the examples you have not edited and keeps any you have;
- adds the policy pages your profession and country usually need (for example a complaints procedure for a UK solicitor) as drafts under Pages. The footer links to each one only once you publish it.
Anywhere else: Other country. Choose your own country from the list under Other country: neutral starter content. Your site gets starter content in plain international English that names no regulator, register, crisis line or law, and a few more questions appear. Card never guesses these; anything you leave empty is left off your site and shown to you as a gap to fill:
- Currency code and Symbol before prices, filled in from your country (change them if you charge in something else);
- Tax wording after prices (consultants and practices), such as “+ VAT”; leave it empty and prices are shown without it;
- Emergency number to show and A crisis line to name (therapists): without them, your footer says you are not a crisis service and names no one to call.
Your registration, fees, address and footer lines are not filled in with an example for another country: until you add them in Your details they are left off the site. The same facts can be changed later under Appearance → Your details → Your country and its facts.
Check your starter content. After the setup, your dashboard and Your details show a box until you press I have checked it. It says which starter content you have, lists anything still missing, and links to each place to change it.
Step 2 is Your details (also under Appearance → Your details). Until you fill it in, the names, quotes, fees, registration numbers and address describe a made-up practice. One screen holds everything that is yours:
- your headline and the paragraph under it, and one line of proof;
- your address, phone, how to get in and how online meetings work;
- each service with its price, how you charge and how clients pay;
- your proof: a client quote and past clients (consultants), your registration and where to check it (therapists and practices), your reviews and where to read them (practices);
- the people a client will deal with, with their licence or credential;
- the legal lines in the footer and, for therapists, the crisis line.
Each one replaces the example wherever it appears: the front page, the booking page, the footer, and what search engines see. An empty box shows the example in grey, so you can see what is still to do. Where the example is general enough to keep (“Video meetings for anyone in the UK”), Use this wording keeps it in one click. Check every regulator line against your own registration.
Your details also reach pages you have saved in the Site Editor. See “Changing your content” for what stays as you left it.
Step 3 is How clients pay (also under Bookings → How clients pay), and it is optional: skip it and your first call stays free. See “The booking rules, and what each one is for”.
Make the site yours. The wizard’s last screen, and a box at the top of the dashboard until it is all done, list what is still the example: each group of details, the front-page photographs, the example case studies and essays, the draft policy pages, your time zone, your booking hours, and a Send a test email button. Each item links to where it is done.
Set a named timezone. This one matters.
The wizard asks for it. To change it later: Settings → General → Timezone. Choose a city, such as London or America/Denver, not a UTC+1 offset.
Card will not show the booking calendar until you do. A UTC offset does not know when the clocks change, so every booking made before a daylight-saving switch would be an hour wrong afterwards. If you are logged in as an administrator you see a note where the calendar should be; visitors see nothing.
Set your hours
Bookings → Availability. For each day, the times you are willing to take calls. Leave a day blank to take none. What is offered is these hours minus anything in your Google Calendar (once connected), minus bookings already made, minus the buffer and notice rules below.